Tuesday, December 18, 2012

Sugar Scrub Soap Cubes

Today I tried a new recipe and I am so so happy with the results! I made beautiful sugar scrub soap cubes!


To make these luxurious body scrub cubes combine 8 oz clear melt and pour soap, 2 oz melted cocoa butter, 2 oz grapeseed oil, 24 oz granulated sugar, any desired colorants or scents. Pour the mixture into a mold, allow to cool and cut into 1-2 inch squares. Enjoy! The grapeseed oil promotes healing within the skin. The cocoa butter softens and moisturizes skin. They glycerin in the melt and pour soap is a wonderful moisturizer! The sugar acts as an exfoliant to soften and smooth skin. These soaps are safe enough to use on hands and facial skin!

Monday, December 17, 2012

Chocolate Peanut Butter Soap (Cold Process)

Well, I was finally able to test the new batch of soap I created a couple of weeks ago! Chocolate Peanut Butter Soap! Oh wow... it has a very thick creamy lather... rinses well and moisturizes very very well! I'm so excited so I thought I would share it with you!

Chocolate Peanut Butter Soap Recipe (Cold Process)
26.7 oz all vegetable shortening
13.3 oz coconut oil (76 degree)
10.0 oz peanut oil
7.0 oz lye
16.5 oz liquid (I used distilled water but really any liquid can be used)
5 tbs all natural peanut butter (creamy)
4 tbs pure unsweetened cocoa powder

combine liquid and lye by adding lye to liquid slowly while continuously stirring. Be sure to wear mask, gloves and goggles during this part as the chemical reaction caused by the caustic lye will burn if it comes in contact with your skin. combine all of the oils (hold back about 1/4 of the peanut oil for use later) and melt together using a double boiler. Allow the oils to cool to 110-120 degrees and cool the lye mixture to 100-110 degrees. Pour the lye mixture into the oils. Using a stick blender, stand mixer or hand mixer blend until you reach trace. A whisk can also be used for this part but it tends to take longer. Add peanut butter to mixture and continue to mix. In separate bowl, mix the remainder of the peanut oil and the cocoa powder. Pour the peanut butter mixture into your chosen mold. Spoon the cocoa mixture onto the mixture in the mold. Carefully mix in the cocoa making swirls and designs as you like. This recipe fills a 5 lb mold. Insulate well for at least 36 hours. Unmold and slice. Cure for 4-5 weeks before use.

Wednesday, December 12, 2012

Final decision on different types of soap loaf molds

From the beginning of my soap making adventure, I thought I needed a big mold to make a large log of soap and many many bars at one time. So I went on Ebay and found a great deal on a 5 pound wooden loaf mold. I was so excited to use it that the day FedEx dropped it off, I quickly brought it in the house and whipped up a nice large batch of my Espresso Coffee Soap.
 However, I now have learned that the type of mold is probably more important than the size of the mold. I believe the ultimate decision of the type of mold to use is dependent upon the preference of the soap maker. I, for one, have tried the large wooden soap mold, the large silicon log soap mold, a couple clamshell molds and several shaped silicon molds. My vote is definitely for the silicon mold regardless if it is the shaped molds or the large log mold. The problem that I have found with the wooden molds is the prep time is very daunting! In order for your soap to come out of the mold easily, you must line the wooden mold with some type of barrier such as parchment paper or plastic wrap. In doing this, I always seem to have lines on the bottom of each of my soap loaves. This in turn, causes more work after the soap has been sliced or your soaps just won't appear as "finished" as someone else's soaps. When you use the silicon molds, this does not happen. You get a nice smooth surface every time!
While searching one of my favorite resources for soap making products, www.Brambleberry.com I found this super ingenious silicon mold designed to function as a liner to be placed inside the wooden molds! I will be ordering several! See the liner by clicking on the link: http://productimages.brambleberry.com/SIL46.jpg . The combination of the wooden mold with the silicon liner is the best of both worlds! You get the sturdiness of the wooden mold and the ease and aesthetic effect of the silicon.
So just be sure as you are going through your own soap making adventure, try several different molds and see which you like better before you lock yourself into just one kind because what works wonders for one person may completely stump someone else! Happy Soaping!  

Sunday, December 9, 2012

Soap making continued...


Well, I just sliced the Chocolate Silk Soap! It looks beautiful! I will be posting pictures of everything in the next day or two... My next trial will be with adding essential oils for scent because I would like to keep my all natural soaps all natural!
On a different note, I am trying to find the best way to market my soap and body products. I have an Etsy website, a facebook page, a webpage, now a blog and soon I am going to try my hand at craft fairs!! I attended a craft fair this morning and this is definitely my new goal! I want to make enough soap to take to the next craft fair in my area. After some investigation, the next show is schedule for mid-April 2013... this is my goal! I just hope that everyone will love my soaps as much as I do!

Saturday, December 8, 2012

Just getting started in soap making

Hello all!
I want to tell you all a little about myself before we jump right into my soap making adventure... I am a mother of 4 wonderful children I actually gave birth to and another 2 that are my stepchildren. I am married to one of the most wonderful (and patient) men in the world! I was born in Texas on an Army base and my husband is Cuban-born. The majority of my life has been lived in the "sunny" state of Florida. I am a labor and delivery nurse at night and I am a novice soap maker during the day when my children are at school and my husband is at work. So now onto the soap discussions...

Why Soap?
Well, as I stated above, my husband is a very patient man. I have never really found my niche in life other than my love of labor and delivery nursing. When I met my husband about 3 years ago one of the first things I noticed about him was that he worked very hard but in his spare time he had a hobby he loved... car stuff of course! I got to thinking... my entire adult life had been spent either furthering my career and/or education and raising my children. Not that any of that is a BAD thing but I had never done anything for myself regarding stress relief and some form of outlet. This is when the endless parade of hobbies began. I have crocheted, quilted, done photography, made jewelry, and then came soaps and body products. At the beginning of each thing, I loved it and I thought... this is it! This is my THING! Then boredom set in and I went on searching for the next thing to try. As I said before, my husband is a very patient man... because if any of you have ever started any one of the previously listed hobbies, you know that they are not cheap. So it always happened the same way... Try something new... realize I can do it... get overly excited... spend a ton of money on supplies... do the hobby until I get bored... store the supplies in a corner of the house... allow the supplies to collect dust while I try a new hobby... repeat...
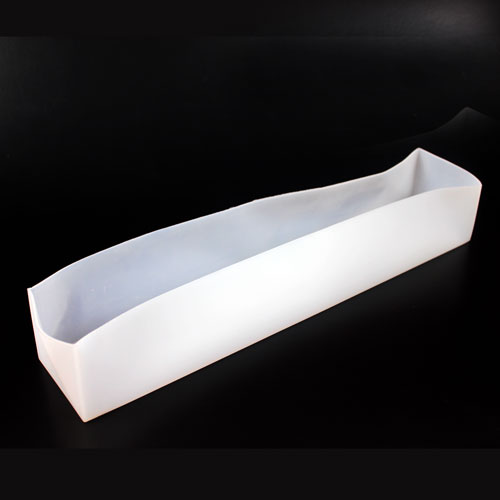
Within the last couple of months, I found cold process soap making. I tried it and viola! A new exciting hobby! (Do you see a trend here?) I'm being honest with myself this time. I truly love soap making... it is challenging and creative all at the same time. The problem with this particular hobby is the cost of the supplies can quickly add up, especially when a lot of the process at the beginning is trying to figure out the perfect recipe or in other words, experimenting! I have done a lot of research in books, the internet, and other blogs. I highly recommend this. It will save you some money because you can read about other people's mistakes and avoid wasting your supplies. Another bit of advise I would give to someone trying soap making for the first time is to start simple. I started out with a 5 lb soap mold! For those of you new to soap making, a 5 lb soap mold is rather large and you must use a lot of oils, liquids and lye in order to have one mold loaf. There are several ideas that can be used in place of an authentic soap mold... just get creative!
Thus far, I have made several natural soaps (no added dyes or fragrances). The first was my Espresso Coffee Soap followed by my Cinnamon Oatmeal Soap. These two were enough of a success to get me hooked! Then I tried a chocolate soap using a different technique called CPOP or Cold Process Oven Process (In this technique, the soap is made in the traditional Cold Process fashion, then placed into a 170 degree oven for about 2 hours, then the oven is turned off but the soap is left in the oven over night). That's probably TMI, sorry.. anyways, that batch was a complete disaster! I have currently sworn off CPOP soap making. However, I may try it again in the future when my supplies aren't so scarce. I then made another batch using the standard Cold Process technique. This was my Peanut Butter Chocolate Soap. It smells wonderful and looks like a big chunk of chocolate swirled peanut butter fudge. After this, I got brave and made a batch of Baby Soft Soap and I added color to this one. When I added the color, it was red and green (it is early December after all  but by the time my soap had cured, it turned pink and purple. So, again I went back to my old standby natural soap! Today I made my Chocolate Silk Soap! I'm super excited to see how it turns out! I made the chocolate portion using the standard cold process I have used in all of my successful batches of soap. The top was made using a technique called whipped soap. So far so good! I put this one in the refrigerator just this afternoon. I will take it out tomorrow afternoon and slice the loaf! Fingers crossed!
In addition to all of my other hobbies listed above, I am also new to blogging so I welcome everyone to view my Etsy shop www.kgar0862.etsy.com and let me know what you think! I have many other items on my page as well. As time goes on, I will be posting different listing explaining what they are and how to make them. FYI, the deodorant stick is the same recipe I use every single day!